
Hello friends! Have you ever heard about hard reset? Do you want to know how to make it on Gionee S6 Pro? If it is about you, then you have to read on this article.
As you understand, hard reset restores the factory settings. The name of the function speaks for itself. It may be necessary to bypass lock pattern. In addition, you can use Gionee S6 Pro hard reset for fixing software errors.
Also hard reset performs one irreversible process, namely clears the memory of the phone. Make sure that you do not store important files in phone’s memory before making reset.
Let’s begin already hard reset Gionee S6 pro.
Gionee S6 pro hard reset
The hard reset option is located in special Android service menu. To enter it, you need to do the following:
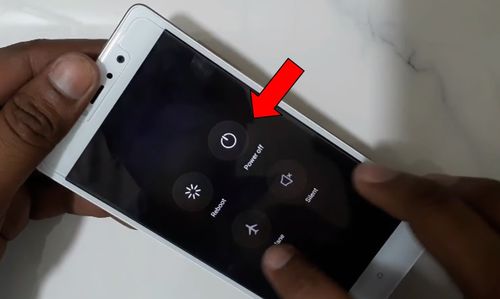
- Press and hold Power button to turn off the smartphone.
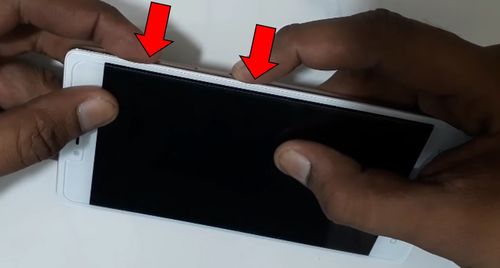
- Then, hold down the two keys, as shown in the image below.

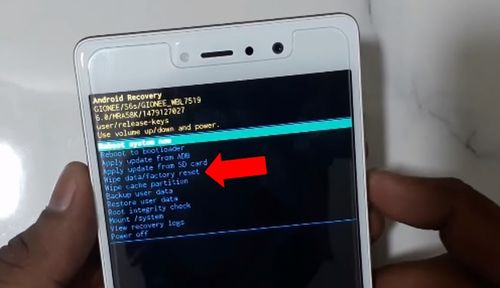
- This is Android service menu, about which we spoke above. Here you can find a function to wipe data and perform factory reset.
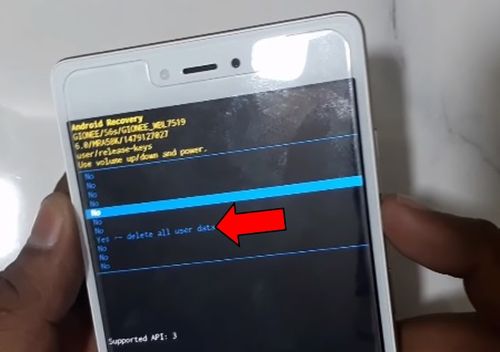
- Then you will see many NO options, but you need to choose Yes.
- It is almost done! There is only one step left. Wait a few seconds until wiping is complete.
- Then you return to the first menu, but this time you need to select the first option – reboot.
- Now that’s all for sure. The smartphone will reboot, and when it is turned on with factory settings.


Thank you guys! Hope our tutorial was helpful for you, and you were able to perform Gionee S6 pro hard reset.
Read another very interesting article about alternative energy of the Sun, water and air.